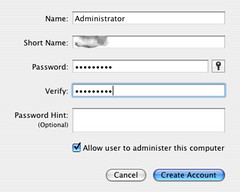
Creating a welcoming and efficient account creation process is vital for any WordPress site. The default WordPress Create Account plugin does a decent job, but to truly stand out, customization is key. This guide will walk you through the steps to customize the WordPress Create Account plugin, making your website not only functional but also uniquely yours.
Why Customize?
Customizing the account creation process can significantly improve user experience. It allows you to:
- Match Your Brand Identity: Tailoring the look and feel to align with your brand enhances brand recognition and trust.
- Enhance User Experience: A user-friendly, intuitive sign-up process reduces bounce rates and increases conversions.
- Add Custom Fields: Gather more relevant information from your users during the sign-up process.
Getting Started: Understanding the Basics
Before diving into customization, ensure you have administrative access to your WordPress site and understand basic PHP and CSS, as these will be essential for tweaking the plugin.
Step 1: Install the Plugin
If not already installed, navigate to your WordPress dashboard, go to Plugins > Add New, and search for the “Create Account” plugin. Install and activate it.
Step 2: Access Plugin Files
Access the plugin’s files via your WordPress dashboard or an FTP client. The files are typically located in wp-content/plugins/create-account.
Customizing the Plugin
Modify the CSS for Visual Changes
- Locate the CSS File: Find the CSS file responsible for the plugin’s styling. This is usually named
style.csswithin the plugin’s folder. - Edit the CSS: Change colors, fonts, and layout to match your site’s theme. For example, to change the submit button color, find the CSS class for the button and modify the background-color property.cssCopy code
.create-account-button { background-color: #4CAF50; /* New color */ }
Add Custom Fields
- Edit the PHP File: Locate the PHP file that generates the account creation form. This is usually
create-account.phpor similar. - Insert Custom Fields: Add HTML code for new fields. For instance, to add a phone number field:phpCopy code
<p> <label for="phone">Phone Number</label> <input type="text" name="phone" id="phone"> </p> - Save and Upload: Save changes and upload the modified file to the server.
Add Custom Validation
- Locate the Validation Script: Find the JavaScript or PHP file handling form validation.
- Customize Validation Rules: Add or modify the validation rules. For JavaScript, this might look like:javascriptCopy code
if (document.getElementById('phone').value.length < 10) { alert("Please enter a valid phone number."); return false; }
Testing and Debugging
After making changes:
- Test Thoroughly: Ensure that all elements work as expected. Check the appearance and functionality on different devices and browsers.
- Debug if Necessary: If something isn’t working, use debugging tools and check error logs to find and fix issues.
Conclusion
Customizing the WordPress Create Account plugin can transform the user registration experience on your site. By aligning the plugin with your brand and adding necessary fields, you not only enhance user experience but also gather valuable data. Remember, the key to successful customization lies in thorough testing and a keen eye for detail.
Happy customizing!
